It’s the first crisp morning after a series of heavy rains. You descend into your basement, only to discover pools of water seeping in, threatening your home’s structure and your peace of mind. This unsettling situation highlights a critical home maintenance aspect—waterproofing exterior basement walls.
Addressing water intrusion from the outside not only safeguards your property but also enhances your home’s value and usability. This guide will delve into effective strategies for waterproofing a basement wall on the outside, ensuring long-term dryness and stability for your foundation.
How To Waterproof Exterior Basement Walls? Step-by-Step Guide
Step 1: Inspect and Prepare the Walls
Begin with a thorough inspection of your basement walls for any signs of damage or existing moisture issues. Identifying cracks, mold, or efflorescence (a powdery white salt deposit) will guide the preparation process. Clean the walls of any debris, mold, or loose material to ensure a smooth application of waterproofing products.
Step 2: Excavation (if necessary)
For comprehensive access to the basement walls, excavation around the perimeter of your home may be necessary. This step should be approached with caution, adhering to safety standards to avoid damaging the foundation.
Step 3: Clean the Exterior Wall Surface
Once exposed, the external surfaces of the basement walls need to be meticulously cleaned. This can involve power washing or manual scrubbing to remove dirt and contaminants that might impair the effectiveness of waterproofing materials.
Step 4: Apply Waterproofing Membrane or Coating
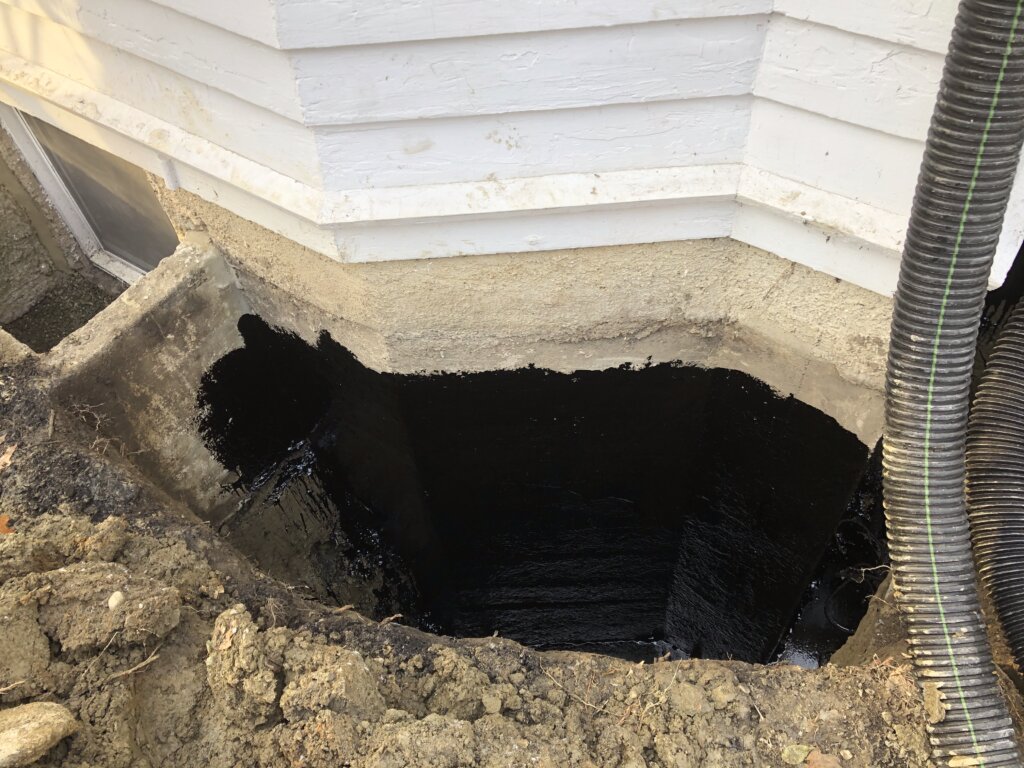
Apply a high-quality waterproofing membrane or coating such as a liquid rubber or bentonite clay. These materials form a physical barrier against water. Ensure the application is even and covers the entire surface to avoid future leaks.
Step 5: Install a Drainage System (e.g., French drain)
Installing a drainage system such as a French drain at the base of your foundation walls is crucial. This system helps redirect water away from your home, thus preventing any accumulation that could lead to moisture penetration.
Step 6: Backfill with Proper Material
The choice of backfill material can significantly affect moisture control. Use coarse gravel or similar drainage-promoting materials instead of soil, which retains moisture.
Step 7: Final Surface Treatment (optional)
For additional protection, consider applying an exterior insulation finishing system (EIFS) or additional drainage boards to help further repel water away from the foundation.
Materials and Tools Needed to Waterproof Exterior Basement Walls
Waterproofing Membranes: Discuss different types of waterproofing membranes like liquid, sheet, or the popular bentonite clay. Each type has its pros and cons, with some providing more flexibility or durability than others.
Sealants and Coatings: The quality of sealants and coatings can drastically affect the longevity of your waterproofing efforts. Products like silicone or acrylic are recommended for their resilient and effective moisture-blocking properties.
Drainage Systems: Emphasizing the significance of proper drainage is crucial. Effective systems like French drains or weeping tiles ensure that water is efficiently redirected away from the foundation, crucial for maintaining dry basement walls.
Tools: List essential tools needed for the project, which may include shovels, trowels, brushes, rollers, and perhaps even excavation equipment, depending on the scale of the project.
Exterior vs. Interior Waterproofing: A Comparative Analysis
While both interior and exterior waterproofing techniques aim to mitigate moisture penetration, their approaches and effectiveness differ significantly. Interior waterproofing methods, such as sealants and water channels, manage water once it has entered the walls, acting more as a mitigation tactic rather than a preventive solution.
On the other hand, exterior basement waterproofing addresses the root cause by preventing water from entering the basement walls in the first place. This method involves a comprehensive approach that includes excavation, wall treatment, and proper drainage solutions, offering a robust defense against moisture penetration.
Conclusion
Waterproofing your exterior basement walls is a crucial step in maintaining the integrity and safety of your home. By following this detailed guide and using the right materials and methods, you can protect your basement from water damage effectively and sustainably. Whether you choose to DIY or hire professionals, the key is thoroughness and quality in every step of the process.
Don’t Let Dampness Dominate: Contact Boston Foundation Repair Today!
At Boston Foundation Repair, we specialize in transforming damp, leaky basements into dry, comfortable spaces. As the leading concrete contractor in Boston, MA, we provide top-tier basement waterproofing services to protect your home and enhance its value. Contact us today to safeguard your space!
Frequently Asked Questions
Q.1 How do you waterproof an exterior basement wall?
A: To waterproof an exterior basement wall, start by cleaning the surface and fixing any cracks. Apply a waterproofing membrane or coating like bituminous or liquid rubber. Install proper drainage, such as a French drain, to manage water away from the foundation, ensuring long-term dryness and stability.
Q.2 How do you seal the outside of a basement wall?
A: Sealing the outside of a basement wall involves cleaning the wall, repairing cracks with hydraulic cement, and applying a waterproof masonry sealer. For enhanced protection, add a drainage board and a French drain system to divert water away from the foundation, ensuring a dry and secure basement.
Q.3 How do you permanently waterproof concrete?
A: To permanently waterproof concrete, apply a crystalline waterproofing agent that reacts with water and concrete to form insoluble crystals, blocking pores. Ensure surface cleanliness and repair any cracks before application. This method offers deep penetration and long-lasting protection against moisture and water ingress.
Q.4 What is the life expectancy of cement waterproofing?
A: The life expectancy of cement waterproofing typically ranges from 10 to 15 years, depending on the product quality, application method, and environmental conditions. Regular maintenance and proper initial application are crucial for maximizing durability and ensuring effective long-term protection against water and moisture ingress.
